If your bike has a water-cooled engine, then periodic changeouts of the coolant – and general cooling system maintenance – are just as necessary as they are when it comes to your car’s engine. But the procedure’s slightly different – and there are some bike-specific things to know, too.
The basic system is similar. You’ve got a radiator – usually (in modern bikes) with a thermostatically controlled electric fan that comes on if the temperature gets to a certain threshold and more airflow is needed to keep the bike from overheating – as when idling in traffic on a hot summer day.
It is important to keep the radiator clean – inside and out. Once a year, it’s a good idea to use a garden hose to de-bug the frontal area (many bikes have a protective plastic mesh in front; you can remove this before spraying the fins with water). Inspect the rows/fins for any signs of physical damage – or leaks. Bent fins can sometimes be bent – gently – back into place. But if you find a leak, you are probably going to need a new radiator. Be prepared: These can be ruin-your-day expensive. (I spent $400 to replace my ’03 ZRX1200’s damaged unit a couple years back.)
There are hoses connecting the radiator to the engine – made of rubber and usually secured with worm clamps, again just like you’d find under the hood of a car. It is good policy to give these a careful visual once over a couple times a year – especially when you’ve got the tank off, so you can see the works. Look for soft spots and bulges – your cue to replace them ASAP. Eventually, you ought to replace them regardless – even if they still look ok. I do, anyhow. Because I’d rather do it in my garage, with all my tools at hand, than have to deal with it by the side of the road, with no tools at hand. My changeout interval is every 10 years – or after 30,000 miles. Your mileage may vary.
Another couple of parts that you might want to check – and possibly, throw in the woods if they’re more than ten years old – are the pressure cap and the thermostat. The pressure cap increases the boiling point of the coolant and the thermostat regulates coolant flow. Both are wear parts – and unlike radiators, they’re pretty cheap. You can test a thermostat’s function by putting placing it in a pot full of cold water, then putting the pot on the stove. As the water warms up, the thermostat – if it’s working – should open up. But, why bother? Thermostats are about $10. Pressure caps can be tested using a pressure tester. If yours is suspect – or it’s more than ten years old – just throw it in the woods and buy a new one. Again, cheap – and easy.
To replace the coolant, you must first drain the old coolant. Do this with the bike cold. Dealing with hot – and pressurized – coolant is a bad idea.
But before you drain anything, go buy the replacement coolant. Be sure to get bike-specific coolant. Don’t use the car stuff. And don’t use tap water. Unless you hate your bike. Or it’s a bike owned by someone you hate.
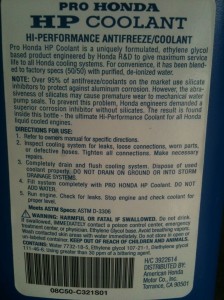
I use the Honda “HP” pre-mix (50-50 ethylene glycol and de-ionized, purified water) without – and this is key when it comes to bikes – silicates, commonly used in automotive-spec coolant as a rust inhibitor. The problem with silicates in bike cooling systems is the silicates are abrasive – and mechanical water pump seals (common in bikes) may wear out – and leak – if you use the silicate-laden, car-intended stuff.
Now you’re ready.
With most bikes, the first step is tank removal – so you can get at the pressure cap/filler neck for the radiator. The usual process is: Take the seat off, then loosen/remove the bolts at the rear of the tank (some older bikes use a rubber strap). Disconnect the fuel (and vacuum) lines from the tank to the carburetor(s), being sure to note their order/location for re-installation. You may want to plug the open fuel lines; a pencil or pen is usually just about the right diameter. Or, use a hemostat to clamp them closed. Hemostats are surgical tools that can be very helpful when working on bikes – or cars. They’re available – cheap – at places like Harbor Freight.
If there’s a sender for the gas gauge, carefully disconnect it. Now – also carefully – slide the tank toward the rear and up as you go.
Set the tank on something soft so as not to scuff the paint or damage the fuel petcock.
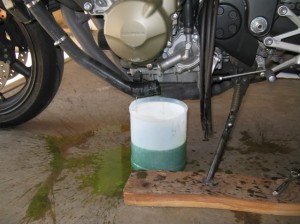
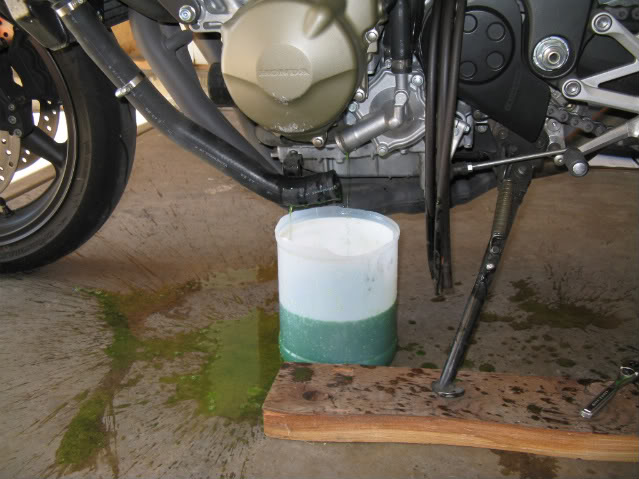
Next, loosed the pressure cap to vent any pressure in the system (again, do this only with the bike cold). Now find the drain plug. It may be located on the bottom of the radiator itself or somewhere else (my ZRX’s drain plug is a small 10 mm bolt located on a pipe near the header collector). With your catch pan underneath, drain the old coolant. Then, re-install then drain plug.
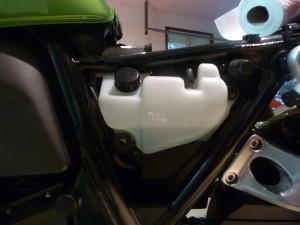
Refill the system with fresh coolant. My bike takes about three quarts. You will also want to dump out any old coolant in the overflow tank – which is typically located behind one of the side covers. If the tank is grungy, clean it – then refill to the “full” line with fresh coolant.
Some bikes have bleeder valves, to remove any trapped air bubbles in the system. My bike has two – one near the very bottom of the engine, the other located by the pressure cap/thermostat housing. The lower one, you just crack open a little, to allow gravity to force out any air. Then re-tighten. The upper one is bled by running the engine to operating temperature, then cracking open the valve to let any trapped air escape. This requires running the engine with the tank off, which means rigging up a way to get fuel to the engine. I use an old funnel, held in place IV-style to the handlebars. It connects to the bike’s fuel line via a section of rubber hose (fuel grade, of course). A cup or so of gas in the funnel is plenty. You only need to run the bike for a few minutes, enough to get it warmed up.
With the pressure cap off, wait for the thermostat to open and warm coolant to flow freely. You can tell the thermostat’s open by dipping your finger in the coolant filler neck (the place where the pressure cap goes on). Once it’s warm, the thermostat’s open. Any air trapped in the system should “burp” out. You can crack the throttle a little to facilitate this. A little. Do not waaaaaaa!!! rev the bike – or expect a mess. If your bike has a bleeder valve like mine, crack it open, let any air that’s trapped escape.
Recheck the level – and top off as necessary. Reinstall the pressure cap. Put the tank back on, hook up the fuel/vacuum lines.
You’re done!
Throw it in the Woods?


Re: old thermostat or pressure cap – “throw it in the woods.” Please be sure it’s your woods, not someone else’s. Several years ago I was out mushroom hunting with a farmer and we came across a group of others doing likewise. When asked why they were there, they said they did not know the woods belonged to someone. !?!?! Knowledge about, let alone respect for, private property is becoming a scarce commodity here in the USSA. The NAP allows for protection of one’s life OR property from aggression.
BTW, have you seen this?
https://www.lewrockwell.com/2014/08/joseph-salerno/engine-of-destruction%E2%80%A8/
Phillip, good article(LRC) and right on the money….so to speak. One way to ensure you don’t actually need to replace a worm style clamp is to find some that are 100% SS. Many say all stainless but that’s just the band. The screw and the body that holds the screw isn’t stainless, in fact, isn’t even decent steel and will go away toot sweet. When picking out clamps, use a magnet. The ferrous screws and bodies stick to the magnet. If nothing on the clamp will stick to a magnet, you have a 100% SS clamp that will virtually last forever.
I found this out when I began doing water well work decades ago. A non-stainless clamp will often simply fall off when you put your nutdriver on it since the inside of the body and the screw will either barely even exist or are completely gone. Either way, they’re only holding themselves on and lost their clamping ability long ago.
Eightsouthman – You’re absolutely right on the hose clamps. If one doesn’t have a magnet, you can usually see the difference between the worm screw and the band. Stainless has a very distinct “silver” or chrome cast to it. A ferrous screw will typically be plated with zinc-chromate and will exhibit a more dull silver or even a gold color. Of course if it’s been in service any length of time, the worm will be rusty. All stainless clamps are more expensive to be sure (and harder to find) but well worth the extra money and effort.
Boothe, I’ve found that anywhere clamps like this can be bought, there generally are many tools with magnets. Just pull one off the rack and use its magnet to test them. I’ve seen brands that said “Stainless” that were only stainless on the band. It really is best to draw a magnet across the entire clamp….just to make sure. You are correct about their being a different hue to the ferrous screws and bases. but it’s often hard to discern.
Can you tilt the bike to release trapped air? On some cars, you jack up the front to let the bubble make it’s way to the radiator.
Hi Chip.
Probably! But it might be easier said than done…!
One of the nice things about working on bikes is that, even though packaging is often tight, you can get at what you need to get at pretty easily. It may sometimes be necessary to take off one thing to get at another thing, but because what you’re dealing with is not entombed under a lot of sheetmetal, this is usually easier than doing the same job on a car.
Even taking out the engine can – again, usually – be done by hand, by one fairly strong man.
Give all the hoses a squeeze. If they make a crunching sound, the rubber’s perished and likely to split on a hot day. Not a good thing. Replace all of them at the same time if you find even one that’s knackered.